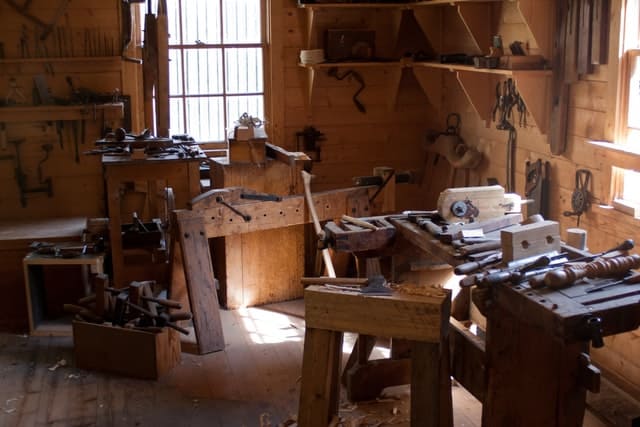
I looked at getting into woodworking and doing it from home and was curious how much space I would need. I have researched this important question and found some fascinating answers.
For all the equipment and tools to be spaced out comfortably, you will need 125 square ft (11.6 square meters). But, if you only have a few machines and do a lot of it by hand, you can set up your woodshop with only 75 square ft (7 square meters).
How exactly you set out your woodshop can be a bit tricky, as well as what are the bare essentials to have. So, read on where I will answer all of the questions and other helpful tips about setting up an amazing woodshop.
How to lay out a wood shop: step by step
The following steps are involved in setting out your woodshop:
- Deciding on whether you want to use machines, hand tools, or both
- Picking the machines to have, and which ones are ideal
- Planning out your workflow so you give yourself enough room and less frustration
- Getting good lighting (subtle tweaks)
- Storage (where to position everything)
1. Deciding on whether you want to use machines, hand tools, or both
Machines take out a lot of the heavy lifting. For example, an electric hand drill saves all the cranking you need to do on a hand drill. A drill press uses leverage, so you barely have to flex a muscle to drill a hole. But, exactly which ones you’re doing to need takes a bit of planning.
The basic tools you will need in every woodworking workshop cost about $500, according to Costhelper.com. Large, heavy, but very easy to use machines can cost $2,000 or more depending on how old they are and their condition. They are generally made of heavy and strong steel and have internal motors and wiring, which need regular checks and additional maintenance.
Some people prefer not to go the machine route because of the additional time it takes to keep your machines in order. But, those that do a lot of woodworking or have a lot of disposable income can get outside help. And as a result, don’t even notice it.
Others love hard work and will install and use machines no matter how difficult it is. It is my opinion to think about your unique circumstances and what you are comfortable with.
Dust production: hand tools versus machine tools
Another factor that will help you decide whether to use hand tools or machine tools is how much dust each of them will produce. Hand tools produce much less dust than machine tools.
If you’ve worked in a woodshop in the past, you will know that the dust gets so overwhelming that you need to open up a window, turn on fans if you got ‘em, and sweep up a lot after a woodworking session. When you use hand tools, the pieces of wood that come off are bigger and easier to clean up. They also put less dust into the air.
As machine tools work a lot faster and go through more wood, they pump way more dust into the air. So, if you use hand tools, most of the time you won’t need to take it easy so that you don’t put as much dust into the air.
But, with machine tools, you will almost always need an extractor fan or open windows to carry away the dust you produce. Otherwise, it will become too dusty, and you won’t be able to work.
Therefore, you should have a plan out how much room you have. And see if it can accommodate an extractor far. Or if the room you are planning on using has windows. Windows and an extractor fan are necessary.
But, if you don’t have room for the machines you want and an extractor fan system in the same shop. Then you can still use some machines. However, you will need to work a lot more slowly. In my opinion, you want to prioritize an extractor fan over other machines if you have machines in your woodshop. The dust is just too much.
When setting up your extractor fan, the ideal way to do it is by running a wide flexible hose from the machine to the extractor. And then either dumping the dust into an outside collection bin or dumping it into the extractor itself. There is a range of extractors you can get. And most come in under $1000.
2. Picking the machines to have, and which ones are ideal
The machines you should have in your woodshop depend on your individual tastes and the type of woodworking you do. Most beginner woodworkers should master woodworking without tools.
That way, you won’t waste money on machines you don’t need. Once you get a feel for the work involved in woodworking, you can see how a machine will or won’t be a good fit for you and your type of woodworking. So, below what machines are ideal to have, and how involved it is to do with hand tools.
The machines that are absolutely ideal are:
- A thickness planer
- A jointer
- A miter saw
- A table saw
A jointer
A jointer works hand in hand with a thickness planer. It produces one face of your board that is exactly flat. The perfectly flat side gets used as a reference for the thickness planer machine. The electric planer can make your board the right thickness and exactly flat, and they essentially work hand in hand. But, generally, you want both.
What hand tools are used to do what a jointer does?
Getting a wood board exactly horizontal and flat without a jointer takes a bit of setup. You’ll need to make a sled and use it with either a router or a circular saw. If you’re never heard of one, it works like a drawer, where you slide a piece of wood horizontally exactly over a frame.
You attach the router or circular saw to the piece that slides horizontally. That way your circular saw or router is kept exactly flat. I included a video that explains how it is done below:
For the hand tools and machine tools I recommend:
Affiliate product
A thickness planer
A thickness planer removes thin layers of wood so that they match the dimensions of your project exactly. This means you can downsize existing wood pieces and make them exactly the right thickness for your project.
Often when you use wood from other projects, it can be almost right but not quite. With a thickness planer, you can easily and quickly make it a bit thinner so that it matches your other pieces of board. You can also use an electric handheld planer, but it makes it difficult to get the surface exactly horizontal and requires more muscle.
When getting an even thickness across the whole board with hand tools, it requires precision, and it is easy to gouge too deep into the wood. With a bit of experience, you will become very good at it, and it becomes gratifying and fun. However, it takes a bit more time.
What hand tools are used to do what a thickness planer does?
A hand planer takes a lot of elbow grease. The ideal setup is to have three different planers: a scrub plane, a jointer plane, and move on to a smoothing plane. But, you can if you don’t have all of these or don’t want to invest in them yet.
You can use just a jack plane. When you use a jack plane it will just take a bit longer than using the three separate planes.
For the hand tools and machine tools I recommend:
A miter saw (chop saw)
A miter saw, or chop saw as they are also called, is a circular electric saw mounted on a steel frame. The angle of it can be adjusted to make cross cuts – cuts that are at an angle rather than straight across.
It has a protractor type of gauge on it, where you can measure the angle you want it to cut it down to the degree. For example, you can adjust the blade’s angle to exactly 45 degrees, while it allows you to keep the board horizontal and square against the saw guides.
You are making miter or diagonal joins on two pieces of wood, which are stronger and look better than a square piece of wood up against another square piece of wood.
What hand tools are used to do what a miter saw does?
Traditionally, and even today, a hand saw gets used, which just every day saw that you’ve probably seen. There are huge ones used 50 to 100 years ago to cut down large trees, and the smaller ones are triangular in shape and need to be sharpened from time to time.
Hand saws are great tools once you learn to use them correctly, especially for smaller cuts. If you need precise cuts, a miter saw is a much better choice. You could also use a table saw to make miter cuts. (See my article here)
Because the blade on a miter saw is fixed, it can power through parts of the wood that are especially tough. You also have to use very little arm strength, and it cuts very fast. It cuts at speed you press the saw into the wood because of how fast the blade is spinning.
When making cuts will save you a lot of time and effort. You can also get perfectly straight cuts and do cuts at an angle with ease.
I wrote a couple of articles on the tools I recommend here (Link Here)
A table saw (bench saw/saw bench)
A table saw is a table that has a circular saw facing the wrong direction – up. But the design makes it very easy to cut pieces of wood. It serves a slightly different function to a miter saw.
Because you can use it to make long cuts along with big pieces of wood, because of its size, you can use it to make long angled cuts that aren’t possible with a miter saw. There is a special attachment where you can adjust the angle you need the wood into the saw.
You can also adjust the height of the wood board to make shallow cuts that don’t go all the way through the board. It also makes it easier to cut when the blade only penetrates the board because it is less likely to get jammed when the blade is rotating in part that has already been cut.
What hand tools are used to do what a table saw does?
You will generally use a handheld electric saw or a hand saw. My typical replacement is a jigsaw. They require a lot more effort and are more susceptible to minor imperfections. Oftentimes, they will leave small splinters of wood on the edges where the wood has been cut, which is a bit of pain to remove.
Professional Woodworkers who do everything using hand tools
Many professional woodworkers make everything by hand. Studio Kuku, owned by an anonymous woodworker, is based in Nakano, Japan. They make chopsticks, teacup holders, and toothpick holders.
She sells her products on e-commerce websites, and because of how unique she commands a high price for her works. Charging US$174 for a 2 inch by 2 inches (5cm x 5cm) tea holder.
Pfeifer studios is another company that makes all of their items only using hand tools. They command a premium price of US $3,000 for a simple bench used to sit on. Their small single person chairs and other items command very high prices because of their timeless look and the fact that each item is custom.
Even if you’re making all of your woodworking projects by hand, it doesn’t mean you can’t make considerable cash by selling your woodworking projects. And often, customers are looking for handmade woodworking items and even prefer them. This article discusses where to sell woodworking products. (Link Here)
What We Make has a business selling reclaimed wood that they restore using only handcrafting methods. Their products have a unique look that you can’t get by using modern machines’ exact precision.
So, whether you decide to use machines or use handmade tools, you can still make amazing looking woodworking products. And also create a successful woodworking business.
3. Planning out your workflow so you give yourself enough room, and less frustration
When you decide where to put your woodworking equipment, such as a workbench, dust extractor, and machines, it is important to give some forethought to where you put them exactly. So, that makes your job easier, and you can also work with a buddy if you want to.
You may even want to plan out where you’re going to put some music speakers if you like to listen to some classical music while you work.
Firstly, you want to think about the path a piece of wood will take as it enters your shop, from start to finish. For example, some people like to work clockwise while others like to work counterclockwise. However, most people prefer to have a central workbench, have machines, sawhorses, and other benches closer to the walls.
You might prefer to have one big workbench on the far wall and a table saw in the middle of your room. Which will give you more room around your table saw for large and long pieces of wood.
Most of the time, though, come up with your best guess, and then you can iron out the kinks and move things around once you’ve had more experience in your woodshop. You can also remember woodshops you’ve been to and think about what you liked and didn’t like about them.
4. Lighting
The type of light you use will impact how much you enjoy your woodworking. Having enough light to see what you’re doing is very important because woodworking is so precise.
Fluorescent lights generally are the worst option. Their harsh light messes with your natural body rhythms, and you want to use as much natural light as possible. According to Woodworking Magazine, you should use LED light bulbs for your overhead light and lamps. I would tend to agree with them on that. LED light bulbs are a softer light, which is easier on your eyes. They are also more energy-efficient, producing the same amount of lumens while consuming fewer watts.
Often in woodworking, you might be gluing something or measuring something at a funny angle to get the right measurement. When this happens, what you are measuring or marking can block itself from the overhead light.
If you are working at night time, there is no outside light, so you will need a movable lamb with a flexible head to give you enough light. You’ll probably find you can store these out of the way and only pull them out when you need them. But, some people like to create a desk specifically for this. However, it can get a bit frustrating if what you’re working on doesn’t fit on the desk.
4. Storage (tools and lumber)
Grouping similar tool sets and machines
Maybe a bit obvious. But, tools that you use one after another, such as a jointer and a thickness planer. That way, you don’t have to walk to the other side of your shop with the piece of wood to do the next step.
You want to minimize as much heavy lifting as possible because it can turn woodworking into a bit of drag you won’t look forward to, especially if you are producing a lot and working in your woodshop as a side business or even full time.
Place your lumber rack next to your mitre saw
You may already be aware that cutting rough stock is much easier with a miter store. For that reason, you should put your miter saw close to your lumber rack.
This will save you time lugging it across your woodshop and also putting offcuts back onto the rack.
Some heavy pieces of wood will need to get stored against a wall and only moved with a friend—for example, very thick slabs for tables and benches. So, it would help if you looked to leave space below your lumber rack and one other space in your woodworking shop for them. If you pile up too much, you won’t be able to reach the wood in your lumber rack.
So, have two designated areas in your woodshop for large items. Unless you know for sure, you’re not going to be doing projects using large slabs of wood.
Store tools close by your workbench
Generally, you will use your tools on your workbench using your vises, clamps, and whatnot. So, it’s easier to place your wood on your workbench and then pull out a tool from underneath your workbench.
You might not have thought of a good alternative to using a trolley to house your most commonly used tools. That way, you can move your tools easily around your woodshop without having to hold heavy ones and make a few back-and-forth trips because you can only hold so many tools in your hands.
The most grueling tool grab is the one that is housed high on a wall. When the wall also has a bench against it. Because when you reach for it, you have to stretch unless you’re above average height, and it’s easy to put your back out.
Have your finishing products and workbench near a window. Outside light and fresh air improve your mood. So putting the workbench where you will do most of your work, near a window will enhance your enjoyment of your craft or hobby.
Finishing products have strong smells and are mildly toxic, so the extra airflow from a window will help a lot when finishing your projects and leaving them to dry.
Summing up all these recommendations:
- Put your work bench near a window
- Put your finishing products near a window
- Put your table saw at the centre the room
- Put tools close by your workbench
- Put your mitre saw near your lumber rack
Now you have the general gist; the next step is laying out your theoretical woodshop.
How to come up with a layout your woodshop
There is an excellent free tool made by Grizzly Industrial that allows you to drag, drop, resize, and position your workbench, tools, and machines. You can set the dimensions of your workbench and machines and the size of the room you are planning on using. You can check it out by clicking here to go to their free online tool.
Conclusion
The amount of space you will need for your woodshop is about 125 square ft (11.6 square meters). But, if you are doing most of your woodworking by hand, you can set up a woodshop for a lot less, about 75 square ft (7 square meters).
You can also set up your woodshop in a way that will save you space. This includes where you put each of your machines and where you store your tools, together with where you put your lumber rack.
Which will make you feel more comfortable in your woodshop, and you will produce higher quality work.
Sources
- Costhelper.com: How Much Does Woodworking Cost?
- Wikipedia: Router (Woodworking)
- Pfeiferstudio.com: Homepage
- Wwmake.com: Homepage
- Woodmagazine.com: Let There Be (Better) light
- Grizzly.com: Grizzly Workshop Planner