A chisel is an absolute necessity in carving wood or metal. But, even more importantly, you want to make sure your chisel is sharp to achieve safe, clean carves and cuts. Unfortunately, over time, it can be hard to spot how dull your chisel really has gotten.
There are a few different ways to test if your chisel is sharp. One general approach is testing a ribbon slice on the wood itself. A sharp chisel will slice through the wood grain, whereas a dull chisel will compress the grain.
In this article, we’ll discuss several methods you can use to test the sharpness of your chisel. So read on for that and everything else you need to know always to have a sharp, effective chisel.
Chisels are one one of the more important tools for woodworking and is one of the topics we plan on discussing during our live online workshops at Cucamonga Woodworking. You can watch our past workshops on YouTube here(Link to Cucamonga Woodworking)
How Do You Test a Chisel’s Sharpness?
There are a few different ways you can choose to test your chisel, or if you want to be sure, go ahead and try them all out!
- Shave Method– Test your chisel on, say, your arm hair. If it doesn’t shave off the hair or only shaves a few hairs, your chisel is not sharp enough. On the other hand, a sharp chisel will shave every single hair it touches. You need to be careful if you’re going to use this method, however, because if you go in at too much of an angle, you can cut yourself.
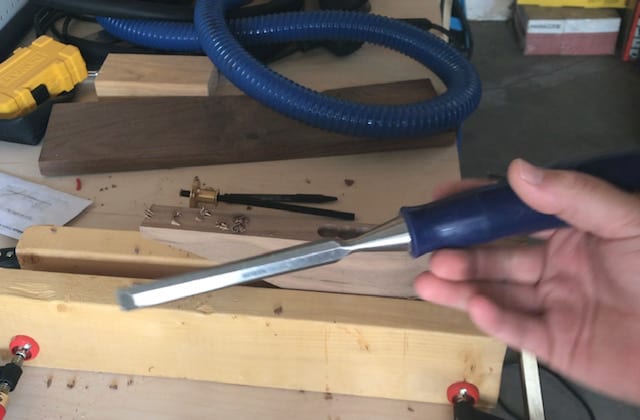
- Paper Test– Take a piece of copy paper and stand it upright. Slice your chisel through the paper- a dull chisel will take some effort to slice through and create a ragged cut. A sharp chisel will create a nice, clean-cut with minimal effort.
- Fingernail Test– Lightly drag the chisel over your fingernail. It should produce shavings if it’s sharp enough. A dull chisel will glide over the nail.
- Light Test– Under a bright light, you won’t see any reflection off a sharp chisel.
Once you determine your chisel is dull, there are some next steps before you sharpen.
Before Sharpening Your Chisel, Flatten the Back
Before you get to sharpen the blade, you first need to flatten the back of your chisel. This step also referred to as lapping your chisel, is just as important as sharpening the blade.
It would be best to lap your chisel because you will be using the back as a guide. If you want your work to be straight, your tool also needs to be straight!
You only need to do this beforehand once, for new chisels. From there on out, you will need to lap your chisel every time after sharpening.
Use Flat Stones or Sandpaper
You can use a few different types of stones to flatten and sharpen your chisel, which we will get to later. However, you do want to make sure that your stones are flat for this. Otherwise, you can use sandpaper.
How to Lap Your Chisel
Make sure the chisel is completely flat on your stone, and have your fingers over the top of the blade. It’s important not to touch the handle, as this will create an uneven surface. Push back and forth until the back is shiny and flat.
At What Angle Do You Sharpen Your Chisel?
The manufacturer will grind the chisel to shape it but to really get a sharp edge; you’re going to need to hone it (sharpen it) before you can use it. If you can see the grinding marks on the bevel, you will need to hone your chisel.
You will want to start at a 25° bevel angle and then do your micro-bevel at 30°. Your angles don’t need to be exact. However, you must maintain the same angle every time.
What Tools Do You Need to Sharpen Your Chisel?
For beginners and even amateurs, a honing guide is handy. It holds the tool at a fixed angle to ensure clean, even strokes when you sharpen your tool.
It’s important that when you hone your chisel, you apply even pressure and keep going until you feel a burr with your finger, which is essentially a lip of metal on the back of the bevel.
A great honing guide like this one helps you achieve the right angle without much extra work.
Different Tools for Different Sharpening Methods
Now it’s time to move onto your sharpening stone. Unfortunately, there is no one way to sharpen your chisel. Everyone has a preferred method. Listed below are a few different options:
Diamond Stone
Diamond stones are always flat and are great for removing a lot of material. However, you will also need a course, fine, and extra-fine stone, so diamond stones are the most expensive. Before use, you will also need to spray a little bit of glass cleaner onto the surfaces and after every 30 or so strokes.
Some woodworkers prefer automotive glass cleaners like this one because of their non-corrosive properties and lack of soaps or fragrances, which can cause rusting on your stones. An automotive glass cleaner will actually prevent the stones from rusting. You can also use water, but it won’t stay on the stone as long as the glass cleaner.
Water Stone
Water stones are better for honing than they are for grinding. Therefore, these are best for simply touching up your chisel. Unfortunately, they also require some setup, which is more time-consuming but is generally more affordable.
You need to soak them in water, which will then create bubbling. Soak them until the water stops bubbling. It will also need to be flattened before use, ironically, with a diamond stone or a Nagura stone.
Oil Stone
This is the more traditional method. Oil stones produce very fine edges but are slow to sharpen. Therefore, you will need oil, as opposed to glass cleaner, as the name suggests. Good options are:
- 3 in one oil
- Any kind of mineral oil
- Honing oil
Pro Tips for Using Stones: Because you will need your stones to remain stationary, you can use a drawer liner, dish drying mat, or furniture stoppers under your stones to keep them from moving around.
Other Methods for Sharpening Your Chisel
There are also some other methods you can use instead of stone, such as:
- Sandpaper. This can be used to both lap and hone your chisel. You can use between 100-150 grit sandpaper and a piece of plywood to attach it to.
- A sharpening system. Systems, such as those made by Tormek, do the trick. Sharpening systems are the quickest and easy method. However, they are quite an investment.
Next Steps: Stropping and Oiling Your Chisel
Once you’ve honed your chisel, you’re going to need to strop it. Stropping is basically refining your edge so that it is even sharper. In addition, it removes any wire edges or bur.
- Use a leather strop, with which you will also need some buffing compound. Leather stropping is the most common method.
- Make your own strop out of sandpaper or plywood. Here’s a great video demonstrating that.
- Multi-purpose oil is good to use once you’ve sharpened your chisel to keep it smooth and shiny and protect it from corrosion.
How Often Do You Need to Sharpen a Chisel?
How often you need to sharpen your chisel will depend on how often you use it and what you are using it for.
More abrasive woodworks may require you to strop it every 10 minutes. Some continuous usage will require sharpening every hour.
There is no right method or formula to how often you need to sharpen it, but you will begin to get a feel for when it needs a good strop with time. More intense woodworks may create noticeable abrasion, in which case it will be obvious.
In Conclusion
Sometimes, it’s difficult to tell just how dull your tool has gotten unless you’ve been working with it continually. If it’s not producing clean, straight cuts, that’s a good indicator that it’s time to hone your chisel. If you feel that it’s starting to dull, a quick sharpness test is always a good idea.