Chisels are an essential tool for those who have decided to embark on the woodworking journey. You may have purchased a lovely set of antique chisels or grabbed a brand new one straight from the shelf. If you’re new to the hobby, you’re likely asking yourself, “Do I need to sharpen this chisel?”
Even a brand-new chisel will need to be sharpened when you bring it home. While a new chisel will still likely be sharp and straight enough to cut into the wood, it will not perform the level of work that you desire. You will need to sharpen and likely put a secondary bevel on the blade of your new chisel.
Chisels coming off of the factory line are sharp to a point (no pun intended). Still, you’ve got some work to do before your new tools are going to be up to snuff.
If you were planning on getting straight to work with your new chisels, you would have to take a slight detour. Read on to learn how to accomplish that.
Chisels are one one of the more important tools for woodworking and is one of the topics we plan on discussing during our live online workshops at Cucamonga Woodworking. You can watch our past workshops on YouTube here(Link to Cucamonga Woodworking)
Why You Need to Sharpen New Chisels
The machining required to produce a chisel doesn’t have the delicate touches needed to refine the tool’s cutting edge. That is why it is up to the user to hone a chisel’s blade to the proper sharpness.
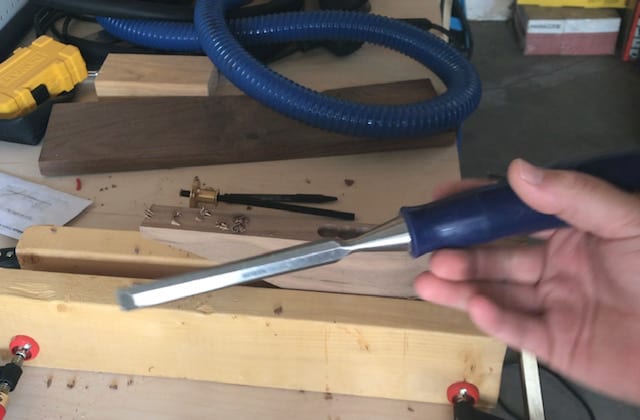
The angle should be set at a standard 25 degrees, so you don’t have to worry about the overall angle. (That might not be true for a vintage tool that has seen a lot of wear, but that is for another article.)
That said, there are actually a few main steps to accomplish to get a new chisel adequately set up and sharpened, including:
- Sharpening by hand or with a grinder
- Flattening the back of the blade
- Squaring and honing the bevel
- Adding a honing bevel
- Finishing
There is no quick and easy method, unfortunately. It will take some time and patience to get the job done right and achieve the desired results.
The silver lining is that once you’ve dialed in all of the above, you will really only have to hone the chisel back to true instead of repeating the process every time you lose your pristine edge.
So, while it will take a bit of elbow grease upfront, your investment will pay off when your chisel is gliding through your woodworking project, and you’re not spending time, and money, sharpening and re-sharpening your tools.
Sharpening – By Hand vs. Grinder
Should you sharpen your chisels by hand using traditional methods, or should you use a grinding wheel? It is entirely up to you. Some swear by the level of control that you get when you sharpen by hand.
Some woodworkers swear by the art of grinding metal with a grinding wheel to get true fast. Both work well for our intended purposes, and in the end, it comes down to what you are comfortable with. A grinding wheel can overheat the metal and cause it to lose its strength, so keep an eye on the metal temperature if you use a grinding wheel.
Sharpening by Hand Using Sharpening Stones.
Sharpening by hand is a simple, albeit multi-stepped process that can net you some perfectly sharpened tools. Since this process doesn’t require any power tools, you can save some money as well, but at the expense of time. You don’t need a lot to get started, just:
- A sharpening medium: A ceramic or diamond sharpening stone or sandpaper affixed to a glass panel
- Multiple grits of sandpaper: 400, 1000, 4000, and 8000
- A leather strop and honing compound
See? You don’t need too many odds and ends to get started using this method. And you’re not going to break the bank either. It could take a bit more time, sharpening by hand, but once you get into the groove, it can go relatively smoothly.
Simply put, all we need to do is start with a good sharpening on a stone-or with sandpaper affixed to a plate of glass-for a perfectly flat level surface. After that, we flatten the back, sand through our grits, and finally add a secondary bevel.(This is a good example of a sharpening stone you can use on Amazon)
To see an in-depth, step-by-step breakdown of the process, check out this article on feltmagnet.com. They do a great job of walking you through each step in detail. There aren’t too many steps, but be prepared to take your time.
Sharpening Via Grinding Wheel
The main reason that some avoid the process of using a grinding wheel is that the steel in your chisel can get quite hot. If your chisel gets too hot, it can lose some of its temperings, resulting in a metal’s softening. This can lead to easier chipping and lower performance.
Luckily, this can be avoided by cooling your chisel periodically in water during the grinding process. So, if you were afraid of this method, fear no more. We will steer you in the proper and safe direction.
What you’re going to need for this sharpening method would be:
- A bench grinder and grinding wheel
- Sharpening stone
- A star-wheel dresser
- Lubricating oil
- Wet/Dry sandpaper and plate glass
Since we are using power tools this time around, don’t forget safety glasses, gloves, and rags to keep your work and work area tidy. This method is relatively similar in that you start by sharpening, though this time, you use a grinding wheel to get to work.
After sharpening, flattening the back, and honing your edges, you go through a similar finishing process to get your chisel to a mirror polish.
How Long Does It Take to Sharpen Chisels?
Here is another speed bump for those that are looking to get chiseling right away. Expect to spend about an hour or so per chisel and give yourself even more time if your edges are beaten up or it’s your first time going through this procedure.
But in woodworking, like most good hobbies, one quickly learns that patience and taking one’s time really pay dividends.
An hour per tool for that initial sharpening is well worth it when you consider how much money you would pay for a sharpening service to perform the same work. Plus, when you get good at sharpening your chisels, and you’ve kept up with your regular maintenance, it only gets easier and quicker.
If you decide to put in that extra bevel, it will be a breeze to quickly hone in any folds in the fine steel edge when it comes time to get to work.
Recap
When buying new chisels, it is up to us, the owners, to get them razor-sharp to do the best job possible. Any woodworker who has been at the hobby for a bit of time quickly learns that proper tool maintenance and care can make the difference between a masterpiece and a project that goes unfinished. Whichever method you decide, make sure it is what you are the most comfortable with so that you do not risk damaging your chisel.
Hopefully, this article helps you to find a sharpening method that works for you. Whether that be getting those tools scary sharp with elbow grease, sandpaper ad glass, or with a good ol’ grinding wheel on the bench grinder, whatever way you do it, you’ll be happy that you did.